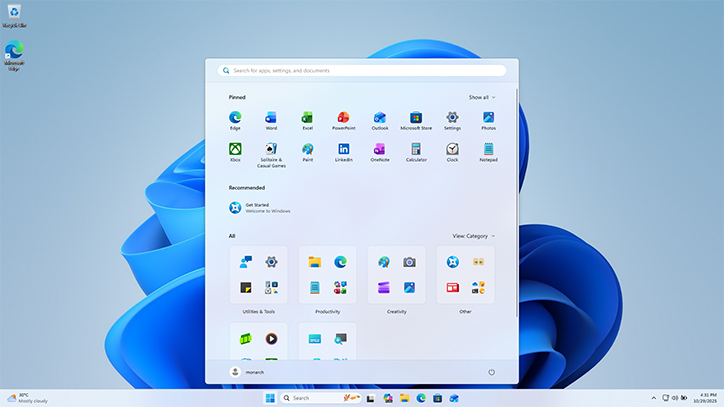
Have you ever wanted to save an important message, capture a funny meme, keep a copy of an online receipt, or show someone an error message on your computer? Instead of taking a blurry photo with your phone, Windows gives you a much better option: taking a screenshot.
A screenshot is simply a digital image of what is currently displayed on your computer screen. It freezes a moment in time, allowing you to save, edit, share, or print exactly what you see. Whether you’re a student saving online notes, a professional documenting a project, a gamer sharing an achievement, or someone helping a friend troubleshoot a computer problem, screenshots have become an essential part of everyday computing.
The good news is that Windows includes several built-in ways to take screenshots. You don’t need to install extra software for most everyday tasks. Different methods are designed for different situations, making it easy to capture everything from your entire desktop to a small portion of your screen.
This guide explains every major way to take screenshots on Windows in clear, beginner-friendly language.
What Is a Screenshot?
A screenshot is a still image of your computer display captured by the operating system. It records whatever appears on the screen at the exact moment you take it.
Unlike a photograph taken with a camera, a screenshot is created digitally by the computer itself. This means the captured image is usually much sharper and clearer than a picture taken with a phone.
Screenshots can include desktop icons, application windows, web pages, documents, menus, games, videos, and nearly anything visible on your display.
Once captured, the image can be saved, edited, printed, or shared with others.
Why Screenshots Are So Useful
Screenshots have become one of the simplest ways to communicate information visually.
Instead of describing an issue with words, you can simply show exactly what appears on your screen.
Students use screenshots to save educational material.
Teachers create visual instructions.
Businesses document reports and presentations.
Customer support teams ask users to send screenshots when diagnosing technical problems.
Designers review layouts.
Writers capture research material.
Gamers preserve memorable moments.
Families even save cherished video call memories.
In many situations, a screenshot communicates information much faster than paragraphs of explanation.
Taking a Screenshot with the Print Screen Key
The easiest and oldest method in Windows uses the Print Screen key on the keyboard.
Depending on your keyboard, the key may be labeled PrtSc, PrtScn, Print Screen, or something similar.
When you press this key, Windows copies an image of your entire screen to the clipboard.
The clipboard is a temporary storage area where Windows keeps copied information until you paste it elsewhere.
After pressing Print Screen, open an application like Paint, Microsoft Word, PowerPoint, or another image editor. Press Ctrl + V to paste the screenshot. You can then save it as an image file.
This method works well when you want complete control over where the screenshot is stored.
Saving a Screenshot Automatically
If you want Windows to save your screenshot instantly without needing to paste it manually, there is an even easier shortcut.
Press Windows + Print Screen.
For a brief moment, your screen may dim slightly. This visual effect indicates that Windows has successfully captured the image.
The screenshot is automatically saved inside the Pictures folder, specifically in the Screenshots folder.
This method is ideal for users who frequently capture their screens because every image is saved automatically with sequential file names.
Capturing Only the Active Window
Sometimes you don’t need your entire desktop.
Perhaps you’re writing a report and only want to capture a browser window or a spreadsheet.
In this situation, press Alt + Print Screen.
Instead of capturing everything visible on your monitor, Windows copies only the currently active window.
You can then paste it into an application just as you would with a normal screenshot.
This produces cleaner images by removing unnecessary desktop clutter.
Using the Snipping Tool
Windows includes a built-in application called Snipping Tool, one of the most flexible screenshot utilities available.
You can open it by searching for Snipping Tool from the Start menu.
The Snipping Tool allows you to choose exactly what you want to capture.
You can capture a rectangular area, a free-form shape, a specific window, or the entire screen.
After capturing an image, the tool immediately opens it for editing.
You can crop the screenshot, highlight important information, draw annotations, or save it in several image formats.
For many users, the Snipping Tool provides the perfect balance between simplicity and flexibility.
Using Windows + Shift + S
One of the fastest screenshot shortcuts in modern versions of Windows is Windows + Shift + S.
When you press these keys together, the screen becomes slightly dim, and a small toolbar appears near the top.
Your mouse pointer changes into a selection tool.
You can simply drag across the area you wish to capture.
After releasing the mouse button, Windows copies the selected image to the clipboard.
A notification usually appears allowing you to open the screenshot for editing inside the Snipping Tool.
Many experienced Windows users consider this the quickest way to capture only the information they need.
Delayed Screenshots
Sometimes menus disappear the moment you click elsewhere.
Perhaps you need to capture a drop-down menu or a pop-up notification.
The Snipping Tool offers a delay feature.
After selecting a delay of several seconds, you have time to prepare the screen before the screenshot is taken automatically.
This feature is especially useful for instructional guides and software demonstrations.
Taking Screenshots While Gaming
Windows includes special tools for gamers through the Xbox Game Bar.
Press Windows + G while playing many supported games.
The Game Bar provides options to capture screenshots without leaving the game.
This helps preserve exciting moments without interrupting gameplay.
Many games also support dedicated screenshot keys, although these vary depending on the game.
Capturing Multiple Monitors
Many people use two or more monitors while working.
Windows can capture everything displayed across all connected screens.
When using the Print Screen key, Windows captures the entire desktop spanning every monitor.
If you prefer to capture only one monitor or one application, using the Snipping Tool or Alt + Print Screen provides greater precision.
Where Windows Stores Screenshots
The storage location depends on the method you use.
If you press Windows + Print Screen, Windows automatically saves the screenshot in the Pictures folder inside the Screenshots subfolder.
If you use Print Screen or Alt + Print Screen alone, the image goes only to the clipboard until you paste and save it manually.
Screenshots created using the Snipping Tool can be saved wherever you choose.
Understanding this difference helps avoid confusion when searching for captured images.
Editing Screenshots
A screenshot often becomes more useful after a little editing.
Windows allows simple edits directly within the Snipping Tool.
You can crop unnecessary areas, highlight important sections, draw arrows, underline text, or add handwritten notes.
For more advanced editing, applications such as Microsoft Paint, Paint 3D, Adobe Photoshop, GIMP, or other image editors offer additional features.
Simple edits can make screenshots much clearer for presentations, tutorials, or technical support.
Sharing Screenshots
Once saved, screenshots can be shared almost anywhere.
You can attach them to emails, upload them to cloud storage, include them in documents, insert them into presentations, or send them through messaging apps.
Many workplaces rely on screenshots to explain software problems or demonstrate completed tasks.
Because screenshots preserve visual details, they often reduce misunderstandings during communication.
Screenshot File Formats
Windows commonly saves screenshots as PNG files.
PNG is an excellent format because it preserves image quality while keeping file sizes reasonably small.
Some editing applications also allow screenshots to be saved as JPEG, BMP, GIF, or TIFF files.
PNG is usually the preferred choice for text, software interfaces, and diagrams because it maintains sharp edges without introducing noticeable compression artifacts.
Protecting Your Privacy
Screenshots often contain sensitive information.
Before sharing one, carefully check whether it includes passwords, email addresses, phone numbers, banking details, private conversations, or confidential work documents.
If necessary, blur or crop sensitive areas before sending the image.
Protecting personal information is an important part of responsible digital communication.
Troubleshooting Screenshot Problems
Occasionally, screenshots may not behave as expected.
If the Print Screen key seems unresponsive, another application may be intercepting the shortcut.
Some laptops require holding the Fn key together with the Print Screen key.
Clipboard managers or third-party software can also affect screenshot behavior.
If screenshots are not saving automatically, check whether the Pictures folder is available and whether sufficient storage space exists.
Keeping Windows updated can also resolve compatibility issues related to screenshot tools.
Screenshot Shortcuts to Remember
Windows includes several convenient keyboard shortcuts that make taking screenshots much faster.
The Print Screen key copies the entire display to the clipboard.
Windows + Print Screen automatically saves the full screen as an image.
Alt + Print Screen captures only the active window.
Windows + Shift + S opens the screen selection tool for capturing a custom area.
Learning these shortcuts can significantly improve your productivity during everyday computer use.
Why Windows Offers Multiple Screenshot Methods
Different users have different needs.
Someone writing a technical guide may need carefully cropped images.
A gamer may want instant captures during gameplay.
A business professional might need only one application window.
A student may simply want to save an online lecture slide.
Rather than forcing everyone to use one approach, Windows provides several methods that suit different situations.
This flexibility has made screenshot tools one of the operating system’s most frequently used productivity features.
Conclusion: A Simple Skill That Makes Everyday Computing Easier
Taking a screenshot is one of the most useful skills every Windows user can learn. It allows you to capture information instantly, preserve important moments, communicate more clearly, and solve technical problems more efficiently. Whether you are saving online research, documenting an error message, creating a tutorial, or sharing something interesting with friends, screenshots make digital communication faster and more effective.
The built-in tools in Windows are powerful enough for most everyday tasks, and learning just a few keyboard shortcuts can save significant time. From capturing your entire desktop to selecting a small portion of the screen with precision, Windows offers a screenshot method for nearly every situation.
Once you become familiar with these tools, taking screenshots becomes second nature. It is a small skill that can greatly improve your productivity, making everyday computing simpler, more organized, and easier to share with others.